
Prepare tools
Before replacing the oxygen sensor, you need to prepare some necessary tools to ensure the smooth replacement process. These tools include:
- Wrench: used to loosen and tighten the bolts that fix the oxygen sensor.
- Socket: Used with a wrench to make it easier to remove and install bolts.
- Screwdriver: May be used to pry up or adjust certain parts to better access the oxygen sensor.
Make sure you have these tools and check their integrity and suitability so that you can be handy during the replacement process.
Oxygen sensor location
Oxygen sensors are often placed in the exhaust system of the car, but their specific location may vary depending on the model. The oxygen sensor is a device used to measure the amount of oxygen in the exhaust gas, which is often called an oxygen content detector. Usually, it is placed on the exhaust manifold or exhaust pipe and is located near the engine. If the oxygen sensor fails, it will cause incomplete combustion, resulting in knocking, which can cause serious traffic accidents. Before replacing the oxygen sensor, you must determine exactly where it is placed. If you are a novice, you can use a multimeter to measure the resistance value of each component, and then use this data to determine whether there is any damage. To achieve this goal, people usually refer to the vehicle's maintenance guide or seek advice from professional maintenance personnel. Once you have determined the exact location, it will be easier to disassemble and install the new oxygen sensor.
Safety precautions
When replacing an oxygen sensor, safety always comes first. Here are some safety precautions to pay attention to:
- Personal safety protection: The oxygen sensor is placed in the exhaust system of the engine, so the temperature in its working area is very high. When the engine is working, high-temperature gases are generated, which may enter the engine through the air filter and cause harm to the human body. Therefore, before replacing it, be sure to make sure that the engine has been thoroughly cooled and wear appropriate protective gloves and glasses to reduce the risk of burns or injuries.
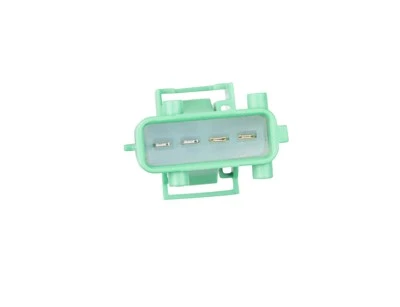
- Electrical connector handling: Before starting to disassemble the oxygen sensor, make sure to disconnect its electrical connector first. Because when connected to the oxygen sensor, current is generated and it cannot work, the circuit between it and the power supply must be cut off. When operating, you must be very cautious and careful to prevent damage to the connector or related circuits.
- Removal of fixing bolts: Use an appropriate wrench or socket to loosen the bolts used to fix the oxygen sensor. When looseness is found after tightening, the fastening nut should be removed immediately. When disassembling, be sure to pay attention to the force and angle of the operation to prevent damage to the bolts or mounting base.
Replacement steps
The following are the specific steps for replacing the oxygen sensor:
1.Disconnect the electrical connector: First, find the electrical connector of the oxygen sensor and carefully unplug it. Make sure not to damage the connector or line during the operation.
2.Loosen the fixing bolt: Use a pre-prepared wrench or socket to rotate the bolt used to fix the oxygen sensor counterclockwise and release it. After tightening, rotate the nut clockwise to tighten it on the measured pipe, and then use a screwdriver to gently turn the threaded part to complete the measurement. When the bolt is too tight, you can apply moderate force, but be careful to prevent damage to the bolt or mounting base.
3.Remove the old oxygen sensor: After loosening the bolt, carefully remove the old oxygen sensor from the installation location. Be careful to avoid collision or damage to other parts.
4.Clean the installation site: Wipe the installation site with a clean cloth to remove dirt and impurities. Make sure the installation site is clean and tidy for installing the new oxygen sensor.
5.Install and secure the new oxygen sensor: Insert the new oxygen sensor into the mounting hole and secure it with bolts. If the air flow is large or corrosive gases enter, it needs to be cleaned. Make sure that the oxygen sensor is firmly installed, does not shake, and fits tightly with the installation location.
6.Connect the electrical connector: Finally, reconnect the electrical connector to the new oxygen sensor. Make sure that the connector is firmly plugged in, has good contact, and is not loose or damaged.
7.During the replacement process, be sure to follow the accuracy and sequence of each step. If you encounter any difficulties or uncertainties, please consult a professional maintenance personnel or refer to the vehicle maintenance manual in time.
 Subsequent inspection and calibration
After replacing the oxygen sensor, you need to perform some follow-up inspections and calibrations to ensure that it is working properly and performing at its best. Here are some items to check:
- Installation firmness check: Check whether the new oxygen sensor is firmly installed, does not shake, and fits tightly with the installation location. If any looseness or abnormality is found, adjust or repair it immediately.
- Electrical connection check: Check whether the electrical connector is well connected, in tight contact, and not loose or damaged. If any problems are found, repair or replace the connector in time.
- Calibration steps: Depending on the actual condition of the vehicle, the new oxygen sensor may need to be properly calibrated. Calibration includes calibrating the oxygen sensor while the vehicle is driving and/or measuring the oxygen concentration in the air in the vehicle environment using a standard method. The main goal of calibration is to ensure that the oxygen sensor can accurately measure the oxygen content in the exhaust gas and feed back these accurate data to the engine control module. In this case, a meter that matches the sensor must be used, otherwise errors will occur. During the calibration process, it is usually necessary to refer to the vehicle manufacturer's recommendations or refer to professional maintenance guides. Here we remind you that if the oxygen sensor fails, it should be recalibrated. In order to ensure the accuracy and stability of the oxygen sensor, you must strictly follow the correct calibration process.
Through subsequent inspections and calibrations, you can ensure that the new oxygen sensor can work properly and perform at its best. This will help keep the engine running efficiently and cleanly and extend the service life of the vehicle.
Replacing the oxygen sensor is a key step in car maintenance. It plays a vital role in ensuring stable engine performance and reducing environmental pollution. Therefore, in this chapter, we will explain in detail the knowledge and precautions required to replace the oxygen sensor. After the detailed description of this article, you have gained an in-depth understanding of the tools required to replace the oxygen sensor, the specific location of the sensor, safety-related issues, the replacement process, and subsequent inspections and calibrations. In order to facilitate readers to have a further grasp of the relevant knowledge of oxygen sensors, this magazine has specially opened an "Oxygen Sensor" column to provide you with some information on oxygen sensor replacement methods and precautions. We hope that this information can help you replace the oxygen sensor smoothly and ensure that your car is always in the best working condition. In addition, we will also explain in detail in the article some knowledge on how to correctly select oxygen sensors and how to detect, adjust and maintain oxygen sensors. At the same time, we also recommend that car owners regularly check and replace oxygen sensors.